
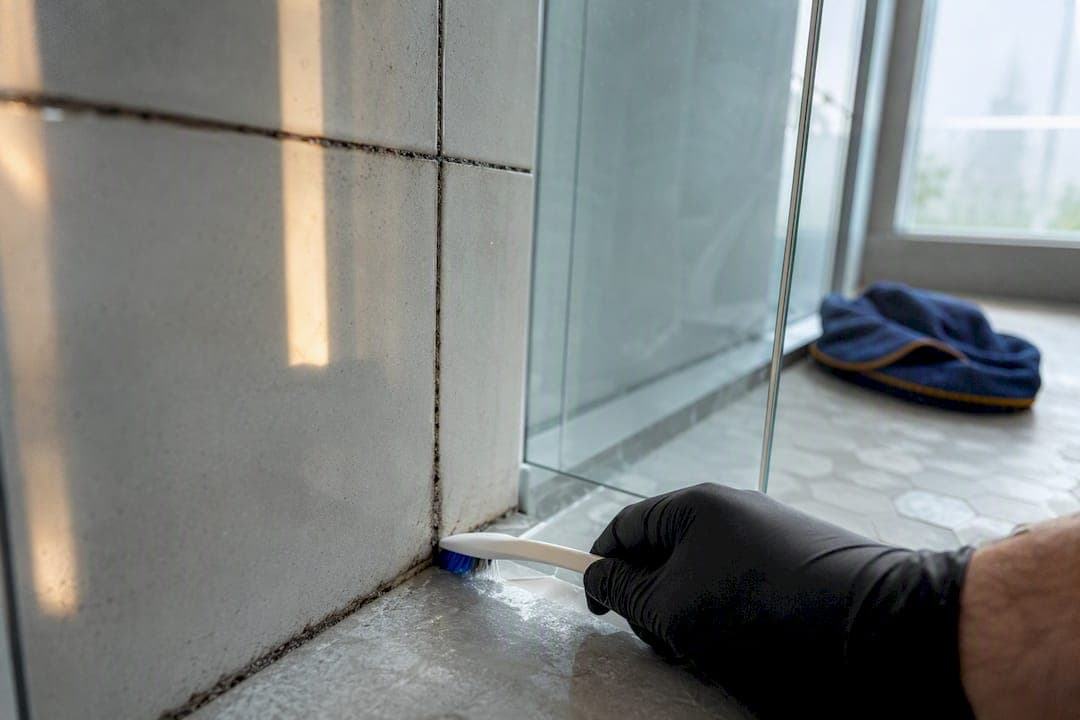
Use 3% hydrogen peroxide or plain white vinegar on porous grout first, both kill surface mould without leaving toxic residue behind. Bleach is recommended only for non-porous tile or glass surfaces, not for use on grout. Always use gloves, a mask, and run a fan when cleaning. If mould covers more than about 10 square feet, keeps returning within weeks, or you're cleaning for someone with asthma or a weakened immune system, stop and call a professional.
TL;DR:
- Use hydrogen peroxide or white vinegar for porous grout and avoid bleach for grout cleaning, reserving it only for non-porous surfaces.
- Always wear proper safety gear, including respirators, gloves, and goggles, and run a bathroom fan during cleaning to reduce airborne spores.
- If mold covers more than 10 square feet or keeps returning within weeks, or if household members are immune-compromised, professional removal is recommended.
- Regularly reseal grout every one to two years and improve ventilation habits to prevent mold recurrence effectively.
- Professional cleaning includes targeted deep cleaning, moisture inspection, and sealing, which can extend mold-free results to over a year.
Table of Contents
- Safety gear you need before you start cleaning shower grout
- Step-by-step methods to remove mold from shower grout
- When grout or caulk needs replacing instead of cleaning
- How to prevent mold from coming back in shower grout
- What a professional inspection catches that DIY misses
- Why cosmetic fixes keep failing homeowners
- Ready to book a professional tile and grout clean?
- Sources
Safety gear you need before you start cleaning shower grout
Mould spores go airborne the moment you start scrubbing, and a bathroom's tight, humid space concentrates them fast. Health Canada treats visible mould as something to remove regardless of the amount, because there's no exposure level considered safe for sensitive lungs.
Before touching a scrub brush, gear up:
- An N95 respirator (not a paper dust mask) keeps spores out of your lungs.
- Rubber gloves protect skin from both mould and the cleaners you'll use.
- Safety goggles stop splash back, especially if you're working with peroxide overhead.
- A bathroom fan running the whole time, plus a window cracked if you have one, pulls spores outward instead of into the hallway.
Stock a spray bottle, a stiff nylon grout brush (an old toothbrush works for tight lines), microfibre cloths, and either 3% hydrogen peroxide or plain white vinegar. Both are sold at any grocery or hardware store, so there's no special sourcing involved.
Pro Tip: Close the bathroom door and run the fan for 20 minutes before you even walk in with cleaner. It drops ambient humidity and gives spores less to cling to once you start disturbing them.
Step-by-step methods to remove mold from shower grout
Different cleaners suit different grout conditions, and picking the wrong one wastes time or damages tile. Here's what actually works, in order of what to try first.
Hydrogen peroxide method (best for most porous grout):
- Pour undiluted 3% hydrogen peroxide into a spray bottle and saturate the mouldy lines.
- Let it sit 10 to 15 minutes. The Spruce notes peroxide breaks down into oxygen and water, so there's no chemical residue left behind once it's done working.
- Scrub with the grout brush, working along the lines rather than across them.
- Rinse thoroughly with hot water and dry the area with a towel or fan.
Vinegar method: Use undiluted white vinegar for stubborn mould, or a 50/50 vinegar and water mix for routine maintenance. Spray, wait 15 minutes, scrub, rinse. Skip vinegar entirely on natural stone tile such as marble or travertine, the acid etches the surface.
Borax method: Mix a quarter cup of borax into a gallon of hot water, scrub it into the grout, and leave it to air dry without rinsing. Borax has mild fungistatic properties, meaning it slows mould regrowth rather than just cleaning what's already there.
Bleach: Diluted bleach (roughly one part bleach to ten parts water) works only on non-porous surfaces like glazed tile or glass shower doors. Clorox points out that bleach can't penetrate the microscopic pores in grout, so it often just bleaches the surface white while mould roots stay put underneath. Never mix bleach with vinegar, ammonia, or any other cleaner, the fumes are dangerous.
When grout or caulk needs replacing instead of cleaning
Cleaning has limits, and pushing past them just wastes a weekend. A mould remediation evidence review makes the point plainly: porous materials with established growth often need physical removal, not repeated surface cleaning.
Watch for these signals that DIY has run its course:
- Mould covers more than roughly 10 square feet of grout or tile.
- The same spots regrow within two to four weeks of a thorough cleaning.
- Caulking is discoloured all the way through the silicone bead, not just on the surface film.
- Anyone in the household has asthma, allergies, or a compromised immune system.
Testing whether caulk is truly stained through is simple: press a fingernail into the bead. If the colour comes from inside the material rather than sitting on top, cleaning won't fix it. At that point, the fix is cutting out the old bead, disinfecting the gap, drying it fully, and reapplying a mould-resistant 100% silicone caulk, detailed guidance from MoldInspection walks through the same sequence. A professional visit typically includes inspection of the grout and substrate, targeted cleaning, complete drying, and sealing to lock the surface against future moisture.
How to prevent mold from coming back in shower grout
Cleaning without fixing moisture and maintaining good water hygiene is a losing cycle. Health Canada's guidance is clear that controlling dampness matters more than any single cleaning product, and most recurring shower mould traces back to poor airflow rather than a weak cleaner.
A few habits make a real difference:
- Run the bathroom fan for a sufficient amount of time after every shower to reduce humidity and moisture.
- Squeegee tile walls and the shower door immediately after use to help remove standing moisture.
- Leave the shower curtain or door slightly open so air can circulate and surfaces dry evenly.
- Rotate bath towels and bathmats so they're not sitting damp against tile.
- Reseal grout every one to two years, since unsealed grout absorbs water and soap residue quickly, giving mould exactly what it needs to establish itself again.
Pro Tip: Wipe down soap film weekly, not just when mould appears. Soap scum traps moisture against grout and gives mould a head start that plain water never would.
What a professional inspection catches that DIY misses
When a professional crew walks into a bathroom with recurring mould, the first stop isn't the visible black spots, it's the substrate underneath. Grout type, tile age, and any sign of moisture trapped behind the wall tell a different story than what's growing on the surface.
Professional work typically layers a few things homeowners can't easily replicate:
- Targeted antimicrobial treatments applied after deep cleaning, not just during it.
- Hot water extraction or steam that reaches deeper into grout pores than a spray bottle can.
- Sealing timed immediately after cleaning, while pores are open and receptive.
That sealing step matters more than most people expect. Professional deep cleaning combined with sealing can stretch clean results out to 18 months or longer, compared to the few weeks many households get from a scrub-and-hope routine. If you're cleaning the same grout lines every month, the math on hiring a pro start to look a lot better than another bottle of peroxide.
Why cosmetic fixes keep failing homeowners
Most advice on this topic treats mould like a stain problem. It isn't. It's a moisture problem that happens to show up as a stain, and that distinction changes everything about how you should approach it.
The conventional wisdom tells people to scrub harder or switch cleaners when mould comes back. That's backwards. If grout mould returns within a month of cleaning, the cleaner isn't the issue, the humidity is. I'd rather see someone spend $15 on a better bathroom fan timer than $50 on a fourth different grout spray that promises to finally work this time.

Here's what I'd prioritize if I were tackling this myself: fix airflow first, clean second, seal third. Skip any of those steps and you're just buying yourself a few weeks before the same grout lines darken again. Sealing gets treated as optional by most DIY guides, and that's the biggest gap I see. Unsealed grout is basically a sponge waiting for spores, no amount of scrubbing changes that structurally.
Homeowners who get lasting results aren't the ones with the fanciest cleaner under the sink. They're the ones who treat ventilation as part of the cleaning job, not a separate chore.
— Rob
Ready to book a professional tile and grout clean?
If you've already tried peroxide, vinegar, and a stiff brush and the mould keeps coming back, the problem usually isn't your technique, it's that surface cleaning alone can't reach what's trapped in the grout pores or behind the caulk bead. Professional tile and grout cleaning services handling inspection, targeted deep cleaning, and drying in one visit, then finishing with sealing to help results hold.

A typical first visit starts with checking the grout and substrate for hidden moisture, followed by extraction cleaning that reaches deeper than a spray bottle ever will. For homeowners who want cleaning and protection handled together, there are tile and grout cleaning with sealer options covering both in one appointment. If you're past the point of another weekend scrubbing the same three tiles, request a quote and get a straight answer on what your bathroom actually needs.
This article is general information, not a substitute for advice from a qualified doctor. Consult a qualified healthcare professional about your own circumstances before acting on anything here.
Sources
- Canada
- Mould remediation evidence review — NCCEH (2014)
- How to clean grout stains & remove mold stains — Clorox